Using EOS at the LPC
Users with computing accounts at the LPC have an EOS area to store analysis files. The space is not accessible from crab jobs or outside cmslpc unless the user has submitted their grid certificate with account creation or submitted a LPC Service Portal form: "CMS Storage Space Request"(Request for creation of EOS area or for increases to EOS space; choose "Enable") - use your Fermilab Services credentials to login.
Despite EOS being mounted on the LPC interactive nodes, users must interact with files on EOS using either EOS-dedicated or xrootd commands, depending on the needs. This page contains most of the information relevant to the use of EOS at the LPC.
Where is my EOS area?
Login to cmslpc-el9.fnal.gov and issue the following command (in blue) - note that you need to use your CERNUsername for CRAB jobs (it may be different from your FNAL username):
[username@cmslpc333 ~]$ eosls -d /store/user/CERNUsername
username
a single line with your own username will indicate that you indeed have an EOS area. If your output instead looks like:
[username@cmslpc333 ~]$ eosls -d /store/user/CERNUsername
Unable to stat /eos/uscms/store/user/CERNUsername; No such file or directory (errc=2)
(No such file or directory)
then your EOS area is not configured to write to your CERNusername. Note that FNALUsername areas are made by default, but if you did NOT provide your grid certificate credentials when you opened your account or submitted a CMS Storage Space request ServiceNow ticket, the system does NOT have your account linked to your CMS grid certificate.
You can test your EOS area grid certificate link with a crab checkwrite:
- Setup your crab working area following the crab3 cheat sheet
crab checkwrite --site=T3_US_FNALLPC- If the checkwrite fails, you have to follow the directions below to get the EOS area enabled and/or linked to your CERNusername.
How to get an EOS area enabled or linked to CERNusername
- Note: this linking is also used for submitting cmslpc condor jobs
- You can get your EOS area linked to your CMS grid certificate by filling a simple form called "CMS Storage Space Request" in the LPC Service Portal form: "CMS Storage Space Request" (Request for creation of EOS area or for increases to EOS space)
- Use your Fermilab Services credentials to login
- Select "Enable" and fill out the form
- Your DN is the result of
voms-proxy-info --identityafter authenticating your grid certificate with thecmsvoms on a linux system - Put in your CERNusername (the username that you use to login to lxplus.cern.ch)
- Note: Your ServiceNow request will be completed automatically within a minute. However, the information is propagated to all nodes with a system that only runs during FNAL business hours. This may take 1-3 hours during FNAL business day.
- Note: If you change your CERN fullname, when you renew your CERN grid certificate it will have a different
identity, for instance if you went fromFirstname MiddleName LastnametoFirstname Lastnamein the CERN database. Then your CERN grid certificate will look different, and thus the new certificate will need to be linked to your EOS area. To resolve this, open a new "CMS Storage Space Request" (Enable), using your services account to login, as described above.
crab checkwrite problems more than 1 business day after your ticket is closed, use the LPC Service Portal to Report "I'm having a problem!". In this case it is useful to paste the full crab checkwrite and results into the form (or attach a text file version with the paperclip icon)How to change a grid certificate mapped to existing EOS area
Presuming you have an EOS area created with the correctCERNusername, but your grid certificate is not allowed to write to it you can request a new "CMS Storage Space Request" (Enable), using your services account to login, as described above. Note: Your ServiceNow request will be completed automatically within a minute. However, the information is propagated to all nodes with a system that only runs during FNAL business hours. This may take 1-3 hours during FNAL business day.If you continue to have
crab checkwrite problems more than 1 business day after your ticket is closed, use the LPC Service Portal to Report "I'm having a problem!". In this case it is useful to paste the full crab checkwrite and results into the form (or attach a text file version with the paperclip icon).
How much space do I have on EOS?
EOS areas are created with a default 2 TB logical quota. However, files stored on EOS are by default replicated and because of that, the physical quota, or the real amount of space needed for files on EOS, is twice as much, or 4 TB by default. The eosquota and eosgrpquota commands have been modified to only show the user the logical quota. Similarly, any EOS quota increase request will only work with the logical quota. As you are reviewing files and usage, there are a number of advanced EOS commands documented on a second web page, including scripts to find space usage, commands to find files older than a year, and similar tools.
Note: replication does NOT indicate backup, files removed from EOS are removed permanently.
EOS quota extensions for users or groups can be requested by filling the LPC Service Portal form: "CMS Storage Space Request"(Request for creation of EOS area or for increases to EOS space) - using your services account to login. Be sure to put in the logical number for final wished quota (that is, before replication).
How do I check the status of the space of EOS areas?
Personal areas
To check the space status of your personal EOS area, login to cmslpc-el9.fnal.gov and issue the following command (in blue):
[username@cmslpc333 ~]$ eosquota
┌────────────────────────────────────────┐
│ Quota Node ==> /eos/uscms/store/user/  │
└────────────────────────────────────────┘
User           Used Space   Used Files  Avail Space  Avail Files    % Used        Space/Files
username            1.83 TB        12004      2.00 TB       500000    91.50%         warning/ok
As long as Used Space remains below Avail Space, you can still add more files to your area. However, it is also important to note that there is also a limit on the number of files that can be stored. The maximum number of files is reported as Avail Files and the number of files already stored is shown under Used Files. A quick summary is shown in the last column Space/Files, representing the current situation for space and number of files with the following meanings:
ok: current usage is below 90%,warning: current usage is between 90% and below the quota, andexceeded: current usage has reached the maximum limit and no more information can be added.
A user can only check his/her personal status and not others from the command line. See below for group space.
LPC Collaborative Group areas
Similarly, to check the space status of a LPC Collaborative group EOS area, login to cmslpc-el9.fnal.gov and issue the following command (in blue):
[username@cmslpc333 ~]$ eosgrpquota lpctrig
┌────────────────────────────────────────────────┐
│ Quota Node ==> /eos/uscms/store/user/lpctrig/  │
└────────────────────────────────────────────────┘
Group          Used Space   Used Files  Avail Space  Avail Files    % Used        Space/Files
us_cms            6.30 TB       127626     10.00 TB      1000000    42.67%              ok/ok
For more about joining LPC Collaborative Groups and understanding members, see this link at the NFS disks documentation
There is one basic, but important difference between personal and LPC Collaborative Group Areas. Information stored on LPC Collaborative group areas do not count against personal space.
If you usexrdcp to transfer files to the collaborative group area, do the command as yourself, NOT with ksu lpcgroupname. Any group directories titled noreplica have actually been replicated.
Note that the LPC Collaborative group areas are accessed through /store/user/lpcgroupname. There is a soft link existing for CRAB jobs to /store/group/ (use config.Data.outLFNDirBase = '/store/group/lpcgroupname'). If for some reason the /store/group/lpcgroupname area is not functioning and the group is within quota, contact LPC Computing Support to get this fixed.
EOS Quota increases
- User quota increase:
- EOS quota extensions for users can be requested by filling the LPC Service Portal form: "CMS Storage Space Request"(Request for creation of EOS area or for increases to EOS space) - using your services account to login.
- Note: Consider also the Advanced tools to find out EOS usage (see the eosdu script as well as the "find" commands to locate files more than a year old or large files). In all cases do NOT use the fuse mount for file removal, as that may crash EOS.
- Login with your Fermilab Services username and password
- Action Requested, choose "Quota increase for a user"
- Be sure to put in the logical number in TB (this will be your new Avail Space if approved)
- Be sure to put in a detailed reason, LPC Coordinators will review the request and approve or reject. You are also asked for your LPC Collaborative group memberships as you should always consider using a collaborative area before increasing your personal quota
- LPC Collaborative group quota increase:
- EOS quota extensions for groups can be requested by filling the LPC Service Portal form: "CMS Storage Space Request"(Request for creation of EOS area or for increases to EOS space) - using your services account to login.
- Note: Consider also the Advanced tools to find out EOS usage (see the eosdu script as well as the "find" commands to locate files more than a year old or large files). In all cases do NOT use the fuse mount for file removal, as that may crash EOS.
- Login with your Fermilab Services username and password
- Action Requested, choose "Quota increase for a group"
- Be sure to put in the logical number (this will be your group's new Avail Space if approved)) for current and increased quota final amount in TB
- type the group name or choose from the list
- Find the number of users with this command on the cluster:
getent group | grep ^lpcgroupname - Be sure to put in a detailed reason, LPC Coordinators will review the request and approve or reject.
Interacting with files on EOS
Depending on the command being used, files or directories on EOS have to be referred to by using, in some cases, their LFN (Logical File Name, or the part of the absolute path starting with /store/) or in other cases their corresponding URL's, but in general never by their absolute paths. The URL is formed by prepending root://cmseos.fnal.gov/ to the LFN.
Each action covered on this section include in the description what to use to refer to a file or directory on EOS.
Listing
There is a dedicated EOS command to list files or directories stored on EOS areas, it uses the LFN of the file or directory of interest to find it (see the image above if you're not sure what a LFN is):
[username@cmslpc333 ~]$ eosls /store/user/username/
MyNtuple.root
MinBias
testing
PhaseII
The default behavior of this command produces a single-column standard output (one file or directory per line, which mimics the behavior of ls -1 of the local file system, note that the flag here correspond to the number 1 and not letter l). what This EOS command can take arguments to modify its basic fuctionality. For example, adding the -l flag will produce a long listing format:
[username@cmslpc333 ~]$ eosls -lh /store/user/username/
-rw-r--r--   2 username   us_cms         3.46 G Jun 29 07:57 MyNtuple.root
drwxr-xr-+   1 username   us_cms        13.52 G May 13 14:52 MinBias
drwxr-xr-+   1 username   us_cms       203.18 k Apr  6 13:51 testing
drwxr-xr-+   1 username   us_cms        47.75 G May 13 14:41 PhaseII
while adding the -d flag will list directory entries instead of their content:
[username@cmslpc333 ~]$ eosls -d /store/user/username/
username
The output of this command is just the name of the directory and nothing else. Adding the -a flag will show hidden entries as well:
[username@cmslpc333 ~]$ eosls -a /store/user/username/
.
..
MyNtuple.root
MinBias
testing
PhaseII
Any combination of the above flags is allowed. The use of multiple flags together (-ld), or separate (-l -d) yields the same result.
Listing by using simple ls with the absolute path to files or directories on EOS is absolutely discouraged as it can significantly reduce the performance of the interactive node. Furthermore, doing so from a batch job is a BIG NO.
There are few things you need to be aware when listing files on EOS areas.
- Wildcards. The use of wildcards is not recognized by EOS commands. A
'*'included somewhere will be interpreted in general as a part of the name and therefore will return an error. For example:
[username@cmslpc333 ~]$ eosls /store/user/username/*
eos: No match.
The same is true for
'?'.
- Tab completion. The EOS listing command uses the LFN, which starts with
/store. Tab completion is not possible as the local filesystem will misinterpret the LFN as a local path starting with/storewhich does not exist.
- The eos commands are only available on the cmslpc interactive nodes. For condor batch jobs use commands such as
xrdcp outputfile.root root://cmseos.fnal.gov//store/user/username/outputfile.rootorxrdfs root://cmseos.fnal.gov ls /store/user/username
Other tools for listing
EOS is a storage filesystem built on the XRootD framework. Because of that, some of the XRootD commands can be used when dealing with files on EOS, and there are some useful ways to list things with XRootD commands in a way that EOS dedicated commands are not able to do. Consult the CMS WorkBook on Xrootd for more on Xrootd.
To get directory listing on XRootD we use xrdfs (which is its file and directory meta-data utility), together with the ls command:
[username@cmslpc333 ~]$ xrdfsls /store/user/username/
[username@cmslpc333 ~]$ xrdfs root://cmseos.fnal.gov ls /store/user/username/
/store/user/username/EOSFile.txt
/store/user/username/MinBias
/store/user/username/README
/store/user/username/basic.C
/store/user/username/testArea
/store/user/username/triggers.py
The default behavior of this command will produce a single-column with one LFN per row, while adding the -u flag (note this IP may change so don't script it, use cmseos.fnal.gov instead):
[username@cmslpc333 ~]$ xrdfsls -u /store/user/username/
[username@cmslpc333 ~]$ xrdfs root://cmseos.fnal.gov ls -u /store/user/username/
root://131.225.207.127:1094//store/user/username/EOSFile.txt
root://131.225.207.127:1094//store/user/username/MinBias
root://131.225.207.127:1094//store/user/username/README
root://131.225.207.127:1094//store/user/username/basic.C
root://131.225.207.127:1094//store/user/username/testArea
root://131.225.207.127:1094//store/user/username/triggers.py
will print URL's instead. The two xrdfs options for listing can be useful in workflows where either the LFN or the URL of a file or directory on EOS is needed rather than just the simple name. The xrdfsls command is an alias available on the interactive but not condor batch envrionment.
Copying
In order to copy files into, out-of or between EOS areas you need to use another XRootD command: xrdcp. In this case, EOS locations need to be included as URL's. There are three possible scenarios:
- Local file to EOS:
[username@cmslpc333 ~]$ xrdcp ~/test.txt root://cmseos.fnal.gov//store/user/username/copyOfLocalFile.txt
[13B/13B][100%][==================================================][0B/s]
- EOS to local file:
[username@cmslpc333 ~]$ xrdcp root://cmseos.fnal.gov//store/user/username/EOSFile.txt ~/copyOfEOSFile.txt
[13B/13B][100%][==================================================][0B/s]
- and finally, EOS to EOS:
[username@cmslpc333 ~]$ xrdcp root://cmseos.fnal.gov//store/user/username/EOSFile.txt \
? root://cmseos.fnal.gov//store/user/username/EOSFile1.txt
[13B/13B][100%][==================================================][13B/s]
xrdcp will assume by default that the destination file does not exist. If the destination file already exist, xrdcp will produce an error message like:
[username@cmslpc333 ~]$ xrdcp ~/test.txt root://cmseos.fnal.gov//store/user/username/copyOfLocalFile.txt
[0B/0B][100%][==================================================][0B/s]
Run: [ERROR] Server responded with an error: [3006] Unable to create file
/eos/uscms/store/user/username/copyOfLocalFile.txt; File exists
Overwriting an existing file can be achieved by adding the -f flag to xrdcp:
[username@cmslpc333 ~]$ xrdcp -f ~/test.txt root://cmseos.fnal.gov//store/user/username/copyOfLocalFile.txt
[13B/13B][100%][==================================================][0B/s]
By now you may have noticed that xrdcp will show by default a text version of a progress bar: [====] (it may be more noticeable on big files because of the time it takes to transfer them). While this is a good way to visualize the progress of this operation, there are some situations in which you may not want such information. Here is an example: a HTCondor job using xrdcp to transfer a file will include the updates on the progress bar in the stderr file for the job, generating non-zero size error files even when the job is completely ok. Here is a typical stderr for a file that is exactly 1,000,000,000 B copied using xrdcp inside a HTCondor job that doesn't give any error:
[username@cmslpc333 myWorkArea]$ more myJob_cluster_process.stderr
[96MB/953.7MB][ 10%][=====>                                            ][19.2MB/s
[128MB/953.7MB][ 13%][======>                                           ][21.33MB/s
[160MB/953.7MB][ 16%][========>                                         ][22.86MB/s
[176MB/953.7MB][ 18%][=========>                                        ][22MB/s]
[208MB/953.7MB][ 21%][==========>                                       ][23.11MB/s
[240MB/953.7MB][ 25%][============>                                     ][24MB/s]
[256MB/953.7MB][ 26%][=============>                                    ][23.27MB/s
[288MB/953.7MB][ 30%][===============>                                  ][24MB/s]
[304MB/953.7MB][ 31%][===============>                                  ][23.38MB/s
[320MB/953.7MB][ 33%][================>                                 ][22.86MB/s
[352MB/953.7MB][ 36%][==================>                               ][23.47MB/s
[384MB/953.7MB][ 40%][====================>                             ][24MB/s]
[400MB/953.7MB][ 41%][====================>                             ][23.53MB/s
[416MB/953.7MB][ 43%][=====================>                            ][23.11MB/s
[432MB/953.7MB][ 45%][======================>                           ][22.74MB/s
[448MB/953.7MB][ 46%][=======================>                          ][22.4MB/s]
[464MB/953.7MB][ 48%][========================>                         ][22.1MB/s]
[496MB/953.7MB][ 52%][==========================>                       ][22.55MB/s
[528MB/953.7MB][ 55%][===========================>                      ][22.96MB/s
[544MB/953.7MB][ 57%][============================>                     ][22.67MB/s
[560MB/953.7MB][ 58%][=============================>                    ][22.4MB/s]
[576MB/953.7MB][ 60%][==============================>                   ][22.15MB/s
[592MB/953.7MB][ 62%][===============================>                  ][21.93MB/s
[608MB/953.7MB][ 63%][===============================>                  ][21.71MB/s
[640MB/953.7MB][ 67%][=================================>                ][22.07MB/s
[672MB/953.7MB][ 70%][===================================>              ][22.4MB/s]
[688MB/953.7MB][ 72%][====================================>             ][22.19MB/s
[720MB/953.7MB][ 75%][=====================================>            ][22.5MB/s]
[736MB/953.7MB][ 77%][======================================>           ][22.3MB/s]
[768MB/953.7MB][ 80%][========================================>         ][22.59MB/s
[800MB/953.7MB][ 83%][=========================================>        ][22.86MB/s
[816MB/953.7MB][ 85%][==========================================>       ][22.67MB/s
[832MB/953.7MB][ 87%][===========================================>      ][22.49MB/s
[864MB/953.7MB][ 90%][=============================================>    ][22.74MB/s
[896MB/953.7MB][ 93%][==============================================>   ][22.97MB/s
[912MB/953.7MB][ 95%][===============================================>  ][22.8MB/s]
[928MB/953.7MB][ 97%][================================================> ][22.63MB/s
[944MB/953.7MB][ 98%][=================================================>][22.48MB/s
[953.7MB/953.7MB][100%][==================================================][22.71MB
[953.7MB/953.7MB][100%][==================================================][22.71MB/s]
To avoid this, remember to add the -s flag to require xrdcp to be silent, for example:
[username@cmslpc333 myWorkArea]$ xrdcp -s root://cmseos.fnal.gov//store/user/username/test.txt .
copies the file from EOS to a local area without showing anything.
You can combine these flags into a single one, -fs, or use them separate, -f -s, with the same result.
Creating directories
In order to create a directory on an EOS area interactively, you need to use the dedicated EOS aliased command eosmkdir and the LFN of the directory to be created:
[username@cmslpc333 ~]$ eosmkdir /store/user/username/newDir
In case of success, this command doesn't produce any standard output. Note: all parent directories leading to the new one should exist for this command to succeed.
Adding the -p flag will make parent directories as needed:
[username@cmslpc333 ~]$ eosmkdir -p /store/user/username/newDir1/newDir2/newDir3
In case of success, this command doesn't produce any standard output and no error is shown if the parents already exist.
In condor batch jobs, the eos commands and aliases are not available and you will need to use xrdfs root://cmseos.fnal.gov type commands instead.
Removing files and directories
First thing to remember when removing files from EOS: a file removed from EOS is gone for good. Second thing to remember when removing files from EOS: a replica is not the same as a backup, the concept of backup does not exist on EOS. Knowing that can make you understand a bit more why wildcards can't be used on EOS, it can be seen as an extra layer of protection against accidental removal of files in bulk. You've been warned.In order to remove files from an EOS area, you need to use the dedicated EOS command rm and the LFN of the file to be removed:
[username@cmslpc333 ~]$ eosrm /store/user/username/EOSFile.txt
This command doesn't produce any standard output.
There is a dedicated EOS command to remove directories, but it only works when the directory is empty. Instead of using that, you can use the extension of the EOS command to remove files that allows the removal of directories whether they are empty or not. To do so, you have to add the -r flag:
[username@cmslpc333 ~]$ eosrm -r /store/user/username/dir
As in the case for files, this command doesn't produce any standard output. Trying to remove a directory without the -r flag, will result in an error like:
[username@cmslpc333 ~]$ eosrm /store/user/username/dir
error: unable to remove file/directory '/eos/uscms/store/user/username/dir'
(errc=21) (Is a directory)
Working with ROOT files on EOS
Access to ROOT files on EOS should be done in general by using a redirector, for example: root://cmsxrootd.fnal.gov. Xrootd file access via cmsxrootd.fnal.gov should include getting your grid certificate proxy first. If you do not have a grid certificate installed, consult this link to obtain and install a grid certificate. Authenticate your proxy:
[username@cmslpc333 ~]$ voms-proxy-init -voms cms
The redirector will look for the file at Fermilab first, if not found, it will continue looking at other sites until the file is found (provided it actually exists on a valid CMS grid Storage Element).
The string /eos/uscms should never appear while opening a ROOT file stored on EOS. If it does, the file will open using the FUSE mount, which in general has a negative impact on the performance of the interactive node, degrading the experience collectively for all the users connected to the same node. On the worker nodes, /eos/uscms won't be mounted any more, therefore, jobs making use of the FUSE mount to open ROOT files on EOS will simply fail.
Interactive access
From the command line on any interactive LPC node, (on any location on the local filesystem, usually somewhere inside /uscms_data, never from /eos/uscms) a ROOT file can be directly open after setting the proper environment in the following way:
[username@cmslpc333 ~]$ root -l root://cmsxrootd.fnal.gov//store/user/username/rootFile.root
root [0]
Attaching file root://cmsxrootd.fnal.gov//store/user/username/rootFile.root as _file0...
(class TFile *) 0x3edd370
Once open, you can navigate through your file and work with it as usual, for example:
root [1] .ls();
TNetXNGFile** root://cmsxrootd.fnal.gov//store/user/username/rootFile.root
TNetXNGFile* root://cmsxrootd.fnal.gov//store/user/username/rootFile.root
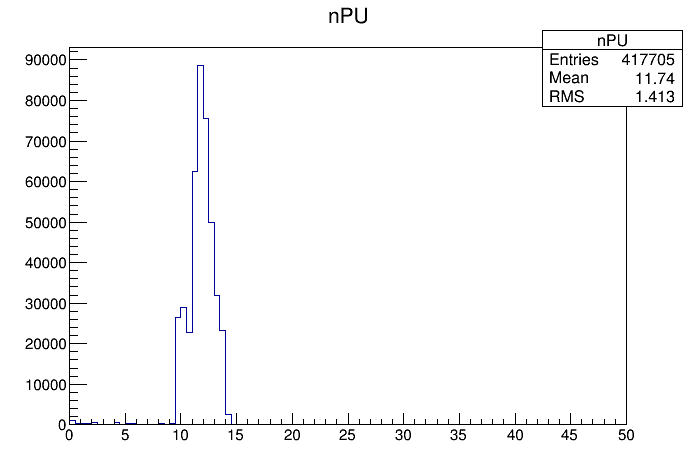
root [2] TH1F *theHist = (TH1F*)_file0->Get("nPU");
root [3] TCanvas *theCanvas = new TCanvas("theCanvas", "Pile-Up", 640, 480);
root [4] theHist->Draw();
root [5] theCanvas->SaveAs("thePlot.png");
Info in < TCanvas::Print >: png file thePlot.png has been created
root [6] .q
to load a histogram from the ROOT file previously open, and create the following PNG file out of it:
If you need to open a file from inside an already initiated ROOT session, you can do the folloiwng:
[username@cmslpc333 ~]$ root -l
root [0]
.
Some ROOT directives
.
root [10] TFile *theFile = TFile::Open("root://cmsxrootd.fnal.gov//store/user/username/rootFile.root");
root [11] .ls();
TNetXNGFile**		root://cmsxrootd.fnal.gov//store/user/username/rootFile.root
 TNetXNGFile*		root://cmsxrootd.fnal.gov//store/user/username/rootFile.root
Hint: If you ever need a quick reminder about the proper way to open a ROOT file after you have initiated an interactive ROOT session, a quick way is just to open another file (on a different terminal or your local machine, for example). Once inside ROOT, hit the upwards arrow on your keyboard, and you will be presented with the line that ROOT used to open the file you indicated from the command line, ROOT appends that by default to the history of the current session (Show me how).
Inside a script
Existing EOS files that need to be open as readable inside scripts, should be open with the constructor shown in the previous section and using their URL's. For writing EOS Files from batch jobs, see below.
Inside a C++-like script
On a C++-like script this would look just like accessing the file interactively:
#include <iostream>
.
.
#include "TFile.h"
.
.
int main(int argc, const char * argv[]) {
    Some code here
    //  Proper way to open an EOS ROOT file:
    TFile *theFile = TFile::Open("root://cmsxrootd.fnal.gov//store/user/username/rootFile.root");
    Rest of code
    return 0;
}
Inside a pyROOT script
On a pyROOT script this would look just like accessing the file interactively through xrootd (note the .Open is needed):
import ROOT
import sys
# Some code here
#  Proper way to open an EOS ROOT file:
f = ROOT.TFile.Open("root://cmsxrootd.fnal.gov//store/user/username/rootFile.root")
# Rest of code
Note: Do not use wildcards (*) with xrootd and python, as you can get duplicate events read.Inside a CMSSW python config file
On a CMSSW python config file this would be easiest letting CMSSW use /store/user:
process.source = cms.Source("PoolSource",
fileNames = cms.untracked.vstring('/store/user/username/myfile.root')
)
Or specify the xrootd redirector specifically root://cmsxrootd.fnal.gov/:
process.source = cms.Source("PoolSource",
fileNames = cms.untracked.vstring('root://cmsxrootd.fnal.gov//store/user/username/myfile.root')
)
Writing EOS files
Do not write directly to EOS from ROOT, or keep a file open writing to it. Instead, write to local storage, whether NFS disk interactively, or the local machine your job is running on (condor batch). Once completed,xrdcp the output.
The preferred methods to write to EOS from a batch job are:
- Through crab3 jobs, which stage the output automatically to EOS at the end of the job when configured to output to T3_US_FNALLPC
- Within condor batch jobs, transferring to EOS from the local worker machine at the end of the job, through xrdcp transfers, described earlier on this page.
Merge files with histograms and trees
Multiple ROOT files stored on EOS can be merged from the command line on any interactive LPC node (from any location on the local filesystem, usually somewhere inside /uscms_data, never from /eos/uscms). Note: CMSSW EDM files cannot be hadded, one should use the CMSSW CopyPickMerge tool instead. For root ntuples: after setting the proper environment (authenticate your grid proxy), hadd can be used by referring to the list of files to be merged by their corresponding URLs. The list can be easily obtained by using the -u option of the xrdfs tool for listing (as explained above). For example, from a CMSSW relase area located inside /uscms_data/d3/username/, after cmsenv one can do:
[username@cmslpc333 ~/nobackup]$ hadd myTarget.root `xrdfsls -u /store/user/username/rootFiles | grep '\.root'`
hadd Target file: myTarget.root
hadd Source file 1: root://131.225.207.127:1094//store/user/username/rootFiles/rootFile0.root
hadd Source file 2: root://131.225.207.127:1094//store/user/username/rootFiles/rootFile1.root
hadd Source file 3: root://131.225.207.127:1094//store/user/username/rootFiles/rootFile2.root
hadd Target path: myTarget.root:/
hadd Target path: myTarget.root:/2h_cone_eta_totalpT_nPU
hadd Target path: myTarget.root:/2h_cone_eta_totalpT_nPU/all
hadd Target path: myTarget.root:/2h_cone_eta_totalpT_nPU/h
hadd Target path: myTarget.root:/2h_cone_eta_totalpT_nPU/e
.
.
.
hadd Target path: myTarget.root:/2p_cone_eta_nPU_totalpT_nPV/h_HF
hadd Target path: myTarget.root:/2p_cone_eta_nPU_totalpT_nPV/egamma_HF
hadd Target path: myTarget.root:/2p_cone_eta_nPU_totalpT_nPV/chs
which merges the three files into a single one named myTarget.root.
There are multiple parts to the line responsible for merging the files. First xrdfsls is used to obtain the list of files on the LFN given as argument, the output will be formatted as URLs instead of just LFNs by adding the -u option. Then, the result of this command is filtered by piping to a grep command which will look just for the .root file extension. This is an important step, files to be merged need to be ROOT files and have the same structure. If the directory where the the files are stored contain other files, trying to use hadd without filtering will fail when trying to initialize a non-ROOT file, exiting due to the error. Note: if the ROOT files don't have the same structure, hadd will still create a target file, it will most likely show warning and error messages and the final product will probably be not precisely what it is supposed to be. Finally, as this command is enclosed inside grave accent marks (`), this will be executed first and the output will be put in place at the end of the hadd command as its last argument.
You can xrdcp your output file from NFS ~/nobackup disk back to EOS:
[username@cmslpc333 ~/nobackup]$ xrdcp myTarget.root root://cmseos.fnal.gov//store/user/username/myTarget.root

[3.267GB/3.267GB][100%][==================================================][101.4MB/s]
Things you shouldn't do
When listing
Do not use regular ls to list EOS areas over the FUSE mount:
                     - - - DON'T DO THIS - - -
[username@cmslpc333 ~]$ ls /eos/uscms/store/.../
                     - - - DON'T DO THIS - - -
This is particularly bad for areas with large number of files. This is particularly bad when using wildcards: *, ?, etc. Do not do it on any interactive node and NEVER do that in a job. See Interacting with files on EOS on this page to find the correct way to do this.
When copying
Do not use regular cp to copy EOS files or directories over the FUSE mount:
                     - - - - - - - - - - - DON'T DO ANY OF THIS - - - - - - - - - - -
[username@cmslpc333 ~]$ cp /eos/uscms/store/.../sourceFile /some/local/area/destFile
[username@cmslpc333 ~]$ cp /some/local/area/sourceFile /eos/uscms/store/.../destFile
[username@cmslpc333 ~]$ cp /eos/uscms/store/.../sourceFile /eos/uscms/store/.../destFile
                     - - - - - - - - - - - DON'T DO ANY OF THIS - - - - - - - - - - -
This is particularly bad when using wildcards, trying to copy large number of files or recursively. Do not do it on any interactive node and NEVER do that in a job. See Interacting with files on EOS on this page to find the correct way to do this.
When removing
Do not use regular rm to remove files or directories over the FUSE mount:
                     - - - - - - - - - - - - - DON'T DO THIS - - - - - - - - - - - - -
[username@cmslpc333 ~]$ rm /eos/uscms/store/.../fileToRemove
                     - - - - - - - - - - - - - DON'T DO THIS - - - - - - - - - - - - -
When reading files
Do not run a script interactively from eos over the FUSE mount (copy it to NFS disk and run it from there):
                     - - - - - - - - - - - - - DON'T DO THIS - - - - - - - - - - - - -
[username@cmslpc333 ~]$ python /eos/uscms/store/user/username/myCoolScript.py
                     - - - - - - - - - - - - - DON'T DO THIS - - - - - - - - - - - - -
Do not use /eos/uscms
The string /eos/uscms should never appear while opening a ROOT file stored on EOS. If it does, the file will open using the FUSE mount, which in general has a negative impact on the performance of the interactive node, degrading the experience collectively for all the users connected to the same node. On the worker nodes, /eos/uscms won't be mounted any more, therefore, jobs making use of the FUSE mount to open ROOT files on EOS will simply fail.
Do not write to EOS without xrdcp or crab3
Do not keep a file open while writing to EOS, for example: piping output to EOS, (RE)CREATE file in ROOT, or hadd directly to EOS.
Do copy to EOS once your file is made locally using xrdcp or crab3.
What are some errors and fixes for EOS?
- Having an active version of CMSSW environment (for example CMSSW_9_2_4) may cause problems with the commands, giving an error such as:
[username@cmslpc333 ~]$ eosls /store/user/CERNusername
eos: symbol lookup error: eos: undefined symbol: _ZN5XrdCl4File4OpenERKSsNS_9OpenFlags5FlagsENS_6Access4ModeEt
- Solve this error by doing the commands in a new terminal without a CMSSW environment
- This should not affect
xrdcpcommands - Note that this is also associated with the EOS client version on the interactive nodes and we should no longer have the error as of April 9, 2018
- If you changed shell by hand, the eos aliases (
eosls,eosquota, etc.) are not loaded. - Do the commands from a new login shell or request a new default login shell.
- Condor batch jobs at the cmslpc do not have access to the interactive
/usr/bin/eoscommands, so commands such asxrdcp root://cmseos.fnal.govorxrdfs root://cmseos.fnal.gov lsshould be used within batch jobs - CMSSW_7_4_7 gives the following when trying to
xrdcpat the end of a condor job to EOS:xrdcp: symbol lookup error: xrdcp: undefined symbol: _ZN14EnvInitializerC1Ev- The solution is to move to a newer CMSSW for the
xrdcpfile transfer step, such as CMSSW_8_0_25 or CMSSW_9_2_3
crab checkwrite --site=T3_US_FNALLPC- Note that this error at the end is a crab-based error and can be safely ignored, for other errors, follow instructions higher up to make a CMS Storage Space Request
- Checkwrite failure:
Error: Unable to write in /store/user/CERNusername on site T3_US_FNALLPC You may want to contact the site administrators sending them the 'crab checkwrite' output as printed above. Note: You cannot write to a site if you did not ask permission. - First consult consult the instructions higher up on this page to make a CMS Storage Space Request to be sure you have done the CMS Storage Space Request
- My checkwrite failed but I know I already got my grid certificate mapped with a CMS Storage Space Request Fermilab ServiceNow ticket?
- Did your name in the CERN database change? For instance if you changed from
Firstname MiddleName LastnametoFirstname Lastname, then your grid certificate identity will change when you renew your certificate. To resolve this, consult the instructions higher up on this page to make a CMS Storage Space Request to get the new certificate identity added. - Did you get a certificate linked to EOS from a different authority (for instance TW) and then are trying to submit from a CERN certificate? To resolve this, consult the instructions higher up on this page to make a CMS Storage Space Request to get the new certificate identity added.
- Did your name in the CERN database change? For instance if you changed from
- If you
xrdcp -rfromroot://cmseos.fnal.gov//store/user/usernametoroot://cmseos.fnal.gov//store/user/username, it will fail withError indexing remote directory.. - This is because
xrdcp -ronly works from local files. Instead, use either the xrdcpRecursive.py script, or use eos cp -pr root://cmseos.fnal.gov type commands. - Alternately If you try
xrdcp -r root://cmseos.fnal.gov//store/user/username/Subdirectory LocalDirectory(to a local file area), it fails for some users withError indexing remote directory.. - This is due to the environment of that user (sometimes CMSSW environment). You can issue the command from a fresh environment in line with the
envcommand, like this: env -i X509_USER_PROXY=${X509_USER_PROXY} xrdcp -r root://cmseos.fnal.gov//store/user/cmsdas/2021/short_exercises/BTag BTag
Exception AttributeError: AttributeError("'NoneType' object has no attribute 'rmtree'",) in <bound method TempDirectory.__del__ of <WMCore.Services.Requests.TempDirectory object at 0x2b9e16a1b7d0>> ignored
Advanced/Additional EOS commands and links
This second web page on Advanced EOS commands at the CMS LPC gives some useful EOS links, scripts, and more advanced command line options to help you find, count, and organize your files on EOS.